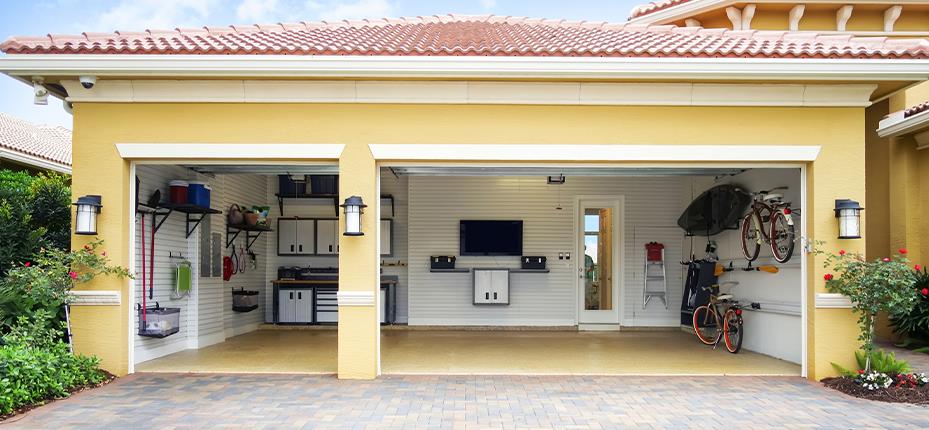
Are you tired of rummaging through clutter in your garage every time you want to tackle a DIY project or work on your car? Creating a well-organized garage workshop can be a game-changer. Not only does it enhance your workspace efficiency, but it also ensures that your garage door functions optimally. In this comprehensive guide, we will explore design and organization tips that will help you transform your garage into a functional and inviting workshop.
1. Assessing Your Space
The first step in creating an efficient and functional garage workshop is to thoroughly assess the space you have available. This crucial phase sets the foundation for the entire design and organization process. Here’s a deeper look at what you should consider when assessing your space:
Measuring Dimensions
Start by measuring the dimensions of your garage. Accurate measurements are essential to make the most of your available space. Measure the length, width, and height of your garage. This information will help you determine the layout and placement of workstations, storage solutions, and other essential elements.
Ceiling Height
Pay special attention to the ceiling height of your garage. Knowing the exact height is crucial, especially if you plan to install overhead storage or lighting fixtures. A garage with a higher ceiling allows for more vertical storage options and better ventilation.
Identifying Obstructions
Take note of any obstructions within your garage. Common obstructions include support beams, water heaters, electrical panels, and ductwork. Identifying these obstructions early on will help you work around them when designing your workshop layout. It’s essential to maintain clear and safe pathways within your garage to avoid accidents.
Door and Window Placement
Consider the placement of your garage door(s) and windows. These openings can affect the layout and positioning of your work areas. Ensure that the garage door can be easily operated without obstruction, and take advantage of natural light from windows to enhance visibility in your workshop.
Traffic Flow
Think about the flow of movement within your garage. Visualize how you will move from one area to another while working on projects. Design your layout to minimize unnecessary steps and optimize the workflow. This consideration is especially important if you plan to use heavy equipment or machinery.
Future Expansion
While assessing your space, also think about future expansion possibilities. You may not need all the available space immediately, but leaving room for growth and additional tools or workstations can save you from having to redesign your workshop later on.
Safety and Accessibility
Ensure that your garage workshop design prioritizes safety and accessibility. This includes creating clear paths for emergency exits, fire safety equipment, and ensuring that tools and materials are stored securely to prevent accidents.
Assessing your garage space is the crucial first step in the journey toward creating a well-organized and efficient workshop. By meticulously measuring dimensions, identifying obstructions, and considering future needs, you’ll be well-prepared to design a workspace that suits your DIY projects and ensures smooth operations.
2. Setting a Budget
Setting a budget for your garage workshop project is not just a smart financial decision; it’s an essential step that will guide you through the entire process. Whether you’re a seasoned DIY enthusiast or a first-time workshop creator, here’s how to effectively establish and manage your budget for this exciting endeavor:
Evaluate Your Financial Situation
Before you dive into creating your dream garage workshop, take a close look at your current financial situation. Consider your income, savings, and any other financial commitments you have. Understanding your financial landscape will help you determine how much you can comfortably allocate to your workshop project without straining your overall finances.
Define Your Workshop Goals
Clearly define your workshop goals and priorities. Are you setting up a basic workspace for occasional DIY projects, or do you plan to have an extensive workshop with specialized equipment? Having a clear vision of your workshop’s purpose will guide your budget allocation.
Research Costs
Research and gather information on the costs associated with your garage workshop project. This includes the prices of tools, equipment, storage solutions, lighting, flooring materials, insulation, and any other elements you plan to incorporate. Be thorough in your research, and don’t forget to consider any potential hidden costs.
Create a Detailed Budget
With a clear understanding of your financial situation and the project’s costs, create a detailed budget. Break down your budget into categories such as tools, storage, lighting, and renovation expenses. Allocate specific amounts to each category based on your priorities and the research you’ve conducted.
Prioritize Essentials
Prioritize essential items in your budget. These are the items that are crucial for your workshop’s functionality and safety. Tools and storage solutions are typically high-priority items. Allocate a larger portion of your budget to these categories.
Account for Contingencies
It’s wise to include a contingency fund in your budget. Unforeseen expenses can arise during any renovation or construction project. Having a contingency fund will help you handle unexpected costs without derailing your project.
Consider Phases
If your budget is limited, consider breaking your garage workshop project into phases. Start with the most critical elements and gradually add more features as your budget allows. Phasing your project can make it more manageable and financially feasible.
Shop Smart
When it’s time to purchase tools and equipment, be a savvy shopper. Look for sales, discounts, and secondhand options for certain items. Consider quality and durability when making purchases to ensure that your investments will last.
Track Expenses
Throughout the project, diligently track your expenses. Keep all receipts and document every expenditure. This will help you stay on top of your budget and make adjustments if necessary.
Regularly Review and Adjust
As your garage workshop project progresses, regularly review your budget. Compare your actual expenses to your initial budget and make adjustments as needed. This will help you stay on track and avoid overspending.
By setting a budget and managing it effectively, you’ll be better equipped to create a garage workshop that meets your needs without causing financial stress. Remember that a well-planned budget is not restrictive but empowering, as it allows you to make informed decisions and achieve your workshop goals within your financial means.
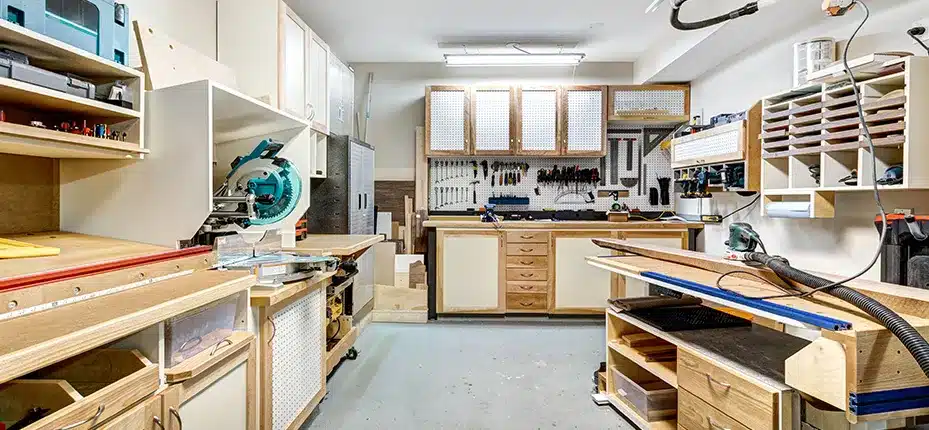
Creating the right layout for your garage workshop is a critical step in ensuring productivity, efficiency, and safety. Here, we delve deeper into two key aspects of workshop layout: considering workflow and optimizing lighting.

3. Designing the Layout
Considering Workflow
Designing a layout that optimizes workflow is essential for any successful workshop. Here are some key considerations:
- 1. Task Zones: Divide your workshop into distinct task zones based on the type of work you’ll be doing. For example, have a dedicated area for woodworking, another for automotive repair, and a third for general DIY projects. This division helps keep your tools and materials organized and easily accessible.
- 2. Frequently Used Tools: Identify the tools you use most frequently and place them within arm’s reach of your primary workstation. This minimizes unnecessary movement and saves valuable time during your projects. Tools like screwdrivers, pliers, and measuring tapes should be easily accessible.
- 3. Workbench Placement: Position your workbench strategically at the center of your workshop. This central location allows you to move around it efficiently and gives you ample space for various tasks. Ensure that it is sturdy and at a comfortable working height.
- 4. Storage Proximity: Place your storage solutions, such as cabinets, shelving, and pegboards, near their corresponding task zones. This ensures that tools and materials are conveniently located where they are needed most. Label shelves and storage containers to keep everything organized.
- 5. Clear Pathways: Maintain clear and unobstructed pathways throughout your workshop. Avoid clutter and ensure that there are no tripping hazards. This not only enhances safety but also allows for easy movement between task zones.
- 6. Safety Zones: Designate specific areas for potentially hazardous tasks, such as welding or using power tools. Ensure these areas are well-ventilated and equipped with the necessary safety equipment, such as fire extinguishers and eye protection.
Optimizing Lighting
Proper lighting is indispensable in a garage workshop. Here’s how to ensure you have the ideal lighting setup:
- 1. Natural Light: If your garage has windows or skylights, make the most of them. Natural light not only reduces the need for artificial lighting during the day but also provides a more pleasant working environment. Ensure that windows are clean and unblocked.
- 2. Artificial Lighting: Install adequate artificial lighting to supplement natural light and provide consistent illumination, especially during evening or nighttime projects. LED lights are energy-efficient and provide bright, white light that closely resembles daylight.
- 3. Task Lighting: Consider adding task lighting directly above workstations and workbenches. Adjustable task lights with a flexible arm or gooseneck allow you to direct light precisely where it’s needed, enhancing visibility for detailed work.
- 4. Even Distribution: Ensure that lighting fixtures are evenly distributed throughout the workshop to eliminate shadows and dark spots. Overhead lighting should be uniform, preventing any areas from being too dim or too bright.
- 5. Lighting Controls: Install lighting controls, such as dimmer switches or motion sensors, to customize the lighting levels based on your specific needs. Dimmer switches allow you to adjust the brightness to your liking, while motion sensors can help save energy by turning lights off when not in use.
By carefully planning your workshop layout with workflow and lighting in mind, you’ll create a space that maximizes efficiency, safety, and comfort. A well-designed layout will enable you to work smoothly on your DIY projects, whether you’re building, repairing, or crafting, while proper lighting ensures you can see every detail with precision.
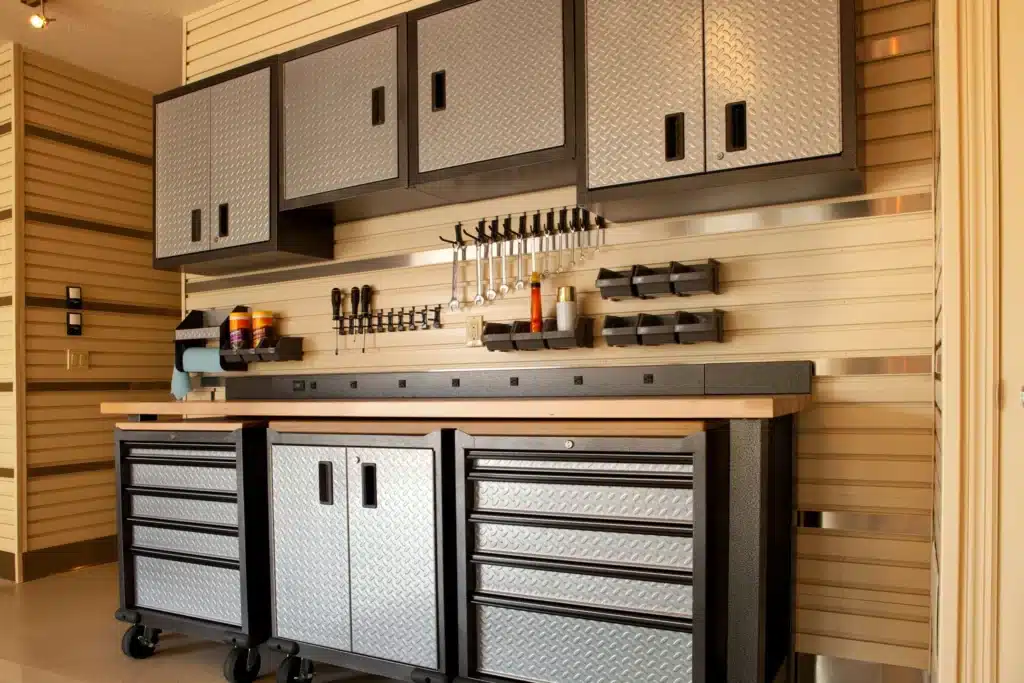
4. Selecting the Right Tools and Equipment
One of the cornerstones of a well-equipped garage workshop is having the right tools and equipment on hand. To embark on a successful DIY journey, it’s crucial to invest in both essential hand tools and power tools. Here’s a closer look at what you need:
Essential Hand Tools
Hand tools are the foundation of any workshop, providing precision and control for various tasks. Here’s a list of essential hand tools to include in your garage workshop:
- 1. Hammers: Hammers come in various types, such as claw hammers and ball-peen hammers. They are essential for driving nails, removing them, and shaping materials.
- 2. Screwdrivers: A set of screwdrivers with various head types (flathead and Phillips) and sizes is indispensable. You’ll use them for assembling, disassembling, and tightening screws and fasteners.
- 3. Pliers: Pliers are versatile tools for gripping, bending, cutting, and holding objects securely. Needle-nose pliers, lineman’s pliers, and slip-joint pliers are valuable additions to your toolkit.
- 4. Measuring Tools: Accurate measurements are crucial in DIY projects. Equip your workshop with measuring tools like tape measures, rulers, and combination squares for precise cuts and layouts.
- 5. Utility Knife: A utility knife or box cutter is invaluable for cutting materials such as cardboard, plastic, and tape. It’s a versatile cutting tool that should always be within reach.
- 6. Wrenches: Wrenches are essential for tightening and loosening nuts and bolts. Invest in both adjustable wrenches and wrench sets with various sizes to cover different applications.
- 7. Levels: Levels ensure that your projects are straight and level. Bubble levels and laser levels help you achieve accurate measurements and alignments.
- 8. Chisels: Chisels are useful for carving, shaping, and cleaning up woodworking projects. They come in various sizes and are essential for fine woodworking tasks.
- 9. Clamps: Clamps hold pieces together securely while glue dries or when you need extra support during assembly. Bar clamps, C-clamps, and spring clamps are common types to consider.
- 10. Utility and Safety Tools: Include utility and safety tools like a utility knife, work gloves, safety goggles, and ear protection in your toolkit. These items ensure your safety and comfort while working.
Power Tools
Power tools are a significant asset in a garage workshop, as they can speed up tasks and increase precision. Here are some essential power tools to consider:
- 1. Cordless Drill: A cordless drill is a versatile power tool that can drill holes and drive screws quickly and efficiently. Look for one with adjustable speed settings and a variety of drill bits.
- 2. Circular Saw: A circular saw is perfect for making straight cuts in wood, plywood, and other materials. It’s a must-have for woodworking projects.
- 3. Jigsaw: A jigsaw is essential for making curved cuts and intricate shapes in various materials, including wood, plastic, and metal.
- 4. Orbital Sander: An orbital sander helps you achieve smooth and even surfaces by quickly sanding away imperfections. It’s essential for finishing touches on your projects.
- 5. Router: A router is a versatile tool used for hollowing out an area or creating decorative edges on wood pieces. It adds a professional touch to woodworking projects.
- 6. Power Screwdriver: A power screwdriver is a time-saving tool for driving screws effortlessly. It’s especially useful for projects that involve a lot of fasteners.
- 7. Electric Saw: An electric saw, such as a reciprocating saw or a miter saw, is handy for cutting through various materials quickly and accurately.
When selecting power tools, consider whether corded or cordless options are more suitable for your workspace and projects. Cordless tools offer greater mobility, while corded tools provide consistent power. Always prioritize safety when using power tools and wear appropriate protective gear.
By investing in these essential hand tools and power tools, you’ll be well-equipped to tackle a wide range of DIY projects in your garage workshop. Whether you’re building, repairing, or crafting, having the right tools at your disposal will make your work more efficient and enjoyable.
5. Garage Door Considerations
When setting up your garage workshop, it’s essential not to overlook the garage door itself. The garage door plays a vital role in regulating the environment inside your workspace and ensuring the security of your tools and equipment. Here are two key considerations when it comes to your garage door:
Insulation
Insulating your garage door is a smart move with several benefits:
- 1. Temperature Regulation: Proper insulation helps regulate the temperature inside your garage. In cold climates, insulation prevents heat loss, keeping your workshop warm and comfortable during winter months. In hot climates, it can keep the interior cooler.
- 2. Energy Efficiency: An insulated garage door contributes to overall energy efficiency. It reduces the need for heating or cooling systems, which can lead to energy savings and lower utility bills. A well-insulated door helps maintain a consistent temperature, making your workspace more comfortable year-round.
- 3. Noise Reduction: Insulation also helps reduce noise from the outside, making your garage workshop a quieter place to work. This is especially important if you live in a noisy neighborhood or have a busy street nearby.
- 4. Durability: Insulated doors often have thicker panels, which can make them more durable and resistant to dents and damage. This added durability can extend the lifespan of your garage door.
When insulating your garage door, you can choose from various materials, such as foam board, reflective insulation, or kits specifically designed for garage doors. Consider hiring a professional if you’re not comfortable with DIY insulation installation.

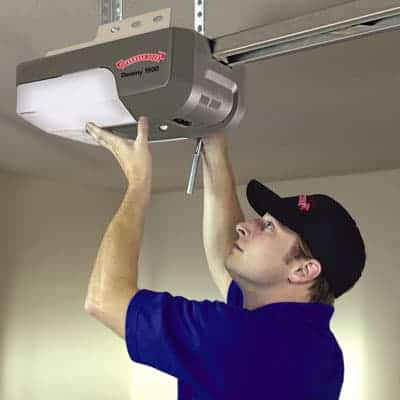
Choosing the Right Opener
Selecting the appropriate garage door opener is crucial to ensure smooth and convenient operation. Here are some factors to consider when choosing the right opener for your garage workshop:
1. Type of Opener
There are three main types of garage door openers:
- Chain Drive: These openers are known for their reliability but can be noisy. They are suitable for detached garages or workshops where noise isn’t a concern.
- Belt Drive: Belt-driven openers are quieter than chain-driven ones, making them an excellent choice if your garage is attached to your home or if you want a quieter workspace.
- Screw Drive: These openers use a threaded rod to move the door and are known for their smooth operation. They are a middle-ground option in terms of noise and are suitable for various garage types.
2. Horsepower
Consider the horsepower (HP) of the opener. Higher HP models are better for heavy garage doors or larger workshop spaces, while lower HP models work well for standard-sized doors.
3. Security Features
Look for openers with advanced security features such as rolling code technology, which changes the code each time you use the opener, enhancing security against potential break-ins.
4. Remote Control
Choose an opener that comes with remote control options. This convenience allows you to open and close the garage door without leaving your workspace. Some models even offer smartphone app integration for remote control.
5. Backup Power
Consider openers with battery backup systems. This ensures that your garage door can still be operated during power outages, preventing any disruptions to your work.
6. Noise Level
If noise is a concern, opt for an opener known for its quiet operation. Belt-driven openers are typically quieter than chain-driven ones.
By insulating your garage door and selecting the right opener, you’ll create a comfortable and secure environment in your workshop. This ensures that your tools, equipment, and projects are protected, while also contributing to the overall functionality and efficiency of your garage workspace.
Conclusion
Creating a garage workshop that seamlessly blends design and organization is a rewarding project for any DIY enthusiast. With the right tools, layout, and a dash of personalization, your garage can become a haven for creativity and productivity.